Pair the phone with the web app
The Android app sends photos, clips and notes to the same backend the web app talks to. Pairing
tells the app where that backend is and, when the page is signed in, gives the phone an access
code of its own. The screens below come from a stack running on a computer with the gate on,
in fixture mode (recorded answers, nothing spent), with the demo set loaded, and from the
app on an Android emulator. The hosted site looks the same; where Check on the phone says
fixture here, it says live for the code, recorded otherwise there, and the footer's
recorded answers only (nothing spent) becomes the spend so far against the cap.
The address in the web pictures is the computer's network address with the port the stack was
started on; the phone pictures show http://10.0.2.2:5223, the emulator's name for the same
computer. On the hosted site the address under the QR code is the backend's,
https://….modal.run, not orphan-parts.pages.dev: type that one.
1. Open the web app and sign in
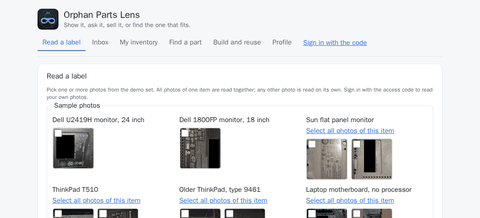
Open the hosted site, or a local stack at the computer's network address (for example
http://192.168.1.20:5173; not localhost, which on the phone is the phone). While the
server has a gate and the page is not signed in, the header ends with Sign in with the
code, Read a label is a gallery of the demo set's photos to pick from instead of an
upload, and the foot of the page, under the gallery, says
Demo: recorded answers only. Sign in to save (on a server with a key, such as the hosted
one, ... Sign in to save and use the live models).
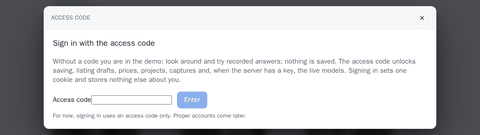
Tap Sign in with the code. The Access code dialog says what the code unlocks (saving, listing drafts, prices, projects, captures and, when the server has a key, the live models) and that signing in sets one cookie and stores nothing else. Type the access code, Enter. For now, signing in uses an access code only; proper accounts come later (Next steps).
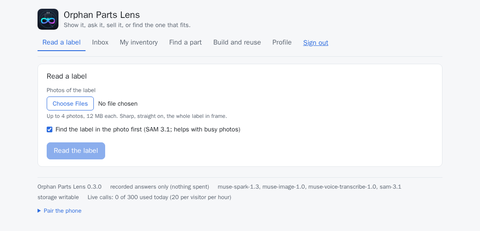
Signed in, the header shows Sign out in its place, Read a label takes your own photos,
and the footer counts the day's calls instead:
Live calls: 0 of 300 used today (20 per visitor per hour). The inventory is the full one now, not
the public items only.
2. Open Pair the phone
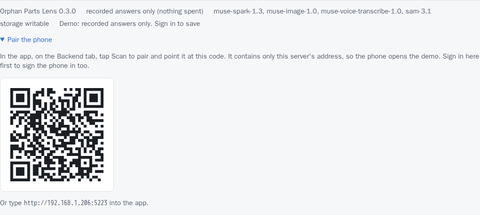
At the foot of the page, open Pair the phone. A QR code is drawn, with the address under it
(Or type http://… into the app.), and a line that says what the code carries.
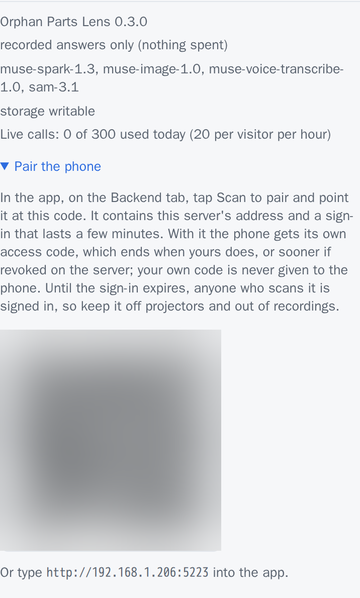
Signed in, the code carries the address and a pairing good for a few minutes (fifteen on a default server). With it the phone claims an access code of its own; that code stays on the phone and ends with the code the page was signed in with, or sooner when revoked on the server. For those minutes the code is a live credential: anyone who scans it is signed in, so keep it off a projector and out of a recording. The page draws a fresh code each time the section is opened, and again before the pairing in it ends.
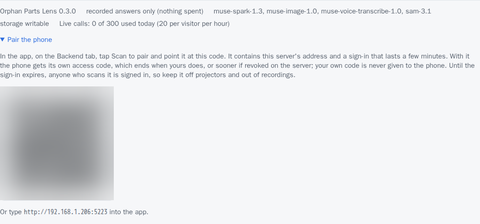
The QR code in this picture is blurred: it carried a live pairing when the screen was taken.
Signed out, the code carries the address alone: the phone joins as the demo. The line under the heading says so (It contains only this server's address, so the phone opens the demo. Sign in here first to sign the phone in too.).
On a phone's browser the same section stacks: the line, the code, the address. Scanning a code shown on the phone's own screen takes a second device; the typed path in step 4 does not.
A page opened at localhost shows no code. It says why: the code would carry an address the
phone cannot reach, and names the two ways out (the computer's network address, or
./dev phone, which prints a code with that address).
3. Scan to pair
In the app (installed from the latest release), open the Backend tab. Its first card is Where the inventory lives, with Scan to pair; the icon at the top right of every tab opens the same scanner.
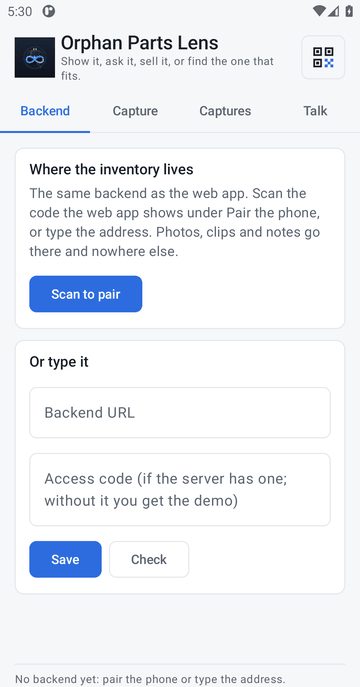
Tap Scan to pair and point the camera at the code. The scanner is Google's, over the phone's camera, so it needs Google Play services and a second screen to point at; the emulator these screens come from has neither, which is why the scanner's own screen is not pictured and the next screens show the typed path. What the app says after a scan:
- From a signed-in page: Paired with http://…; this phone now has a code of its own (phone …, until …). The label and the end date are shown, never the code itself.
- From a page that is not signed in: Paired with http://… as the demo visitor: nothing it sends is kept. Sign in on the web app and scan its code to give this phone a code of its own.
- From a page open at
localhost: Could not pair: that code points at localhost, which on the phone is the phone itself.
Then tap Check. With a code of its own the answer is Backend ok, Model API live for the
code, recorded otherwise, demo gated. The phone's own code (phone …, until …) opens it.
(Model API fixture on a stack in fixture mode.) The phone's code lasts thirty days, or until
the code that paired it ends if that is sooner; one access code pairs at most ten phones. The
tab names the code the phone holds, by label and end date, and how to end it on the server.
Unpair, beside Save and Check once the phone has an address, makes the phone forget
the address, its code and its session after a confirmation; the code itself stays valid until it
is revoked on the server (./dev keys revoke "phone …").
4. Type the address instead
Without Google Play services, or without a second screen to show the code on, type what the code carries. On the Backend tab, under Or type it: the address from under the QR code into Backend URL, the access code into the field under it (Access code (if the server has one; without it you get the demo)), then Save. The code is shown as dots while it is typed.
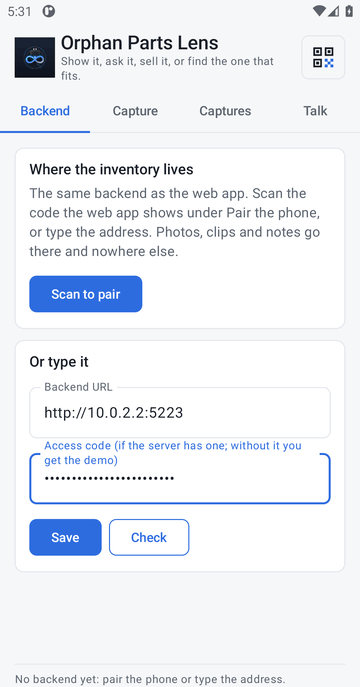
Tap Check. The answer ends with The code opens it. A wrong or expired code answers The code is refused.; an address the phone cannot reach answers Not reachable. The line at the foot of every tab names the backend and its mode from then on.
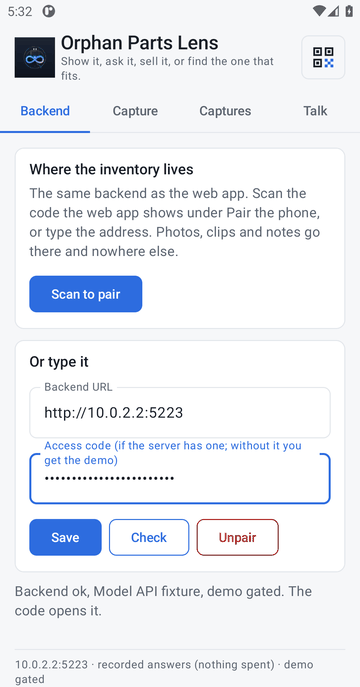
Typed this way the phone keeps the access code itself; a later scan of a signed-in page replaces it with a code of the phone's own.
5. Send a photo
On the Capture tab (Capture an item), Take a photo opens the camera; the photo comes back as a thumbnail under the buttons and the button reads Another photo (1/4). Record a video and Hold to talk add a short video and a spoken note in the same way.
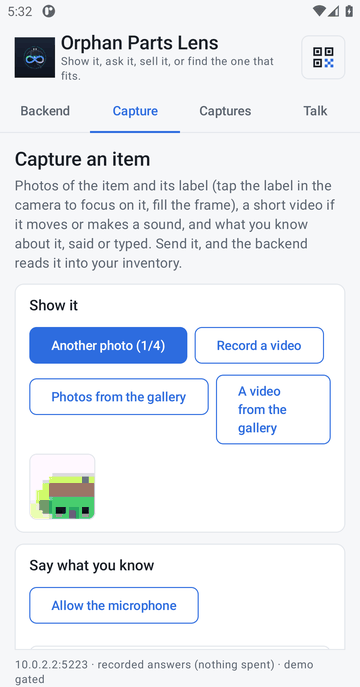
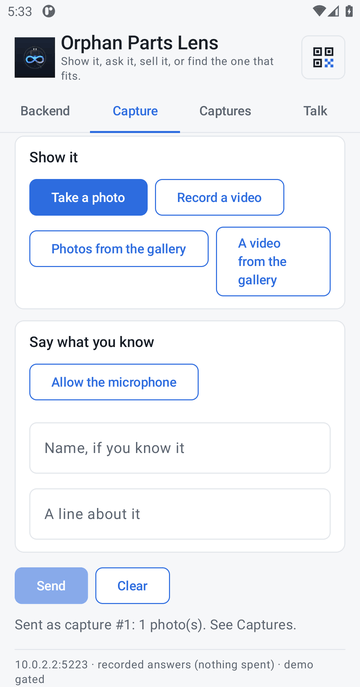
Scroll down and tap Send. The status line says Sent as capture #1: 1 photo(s). See Captures.
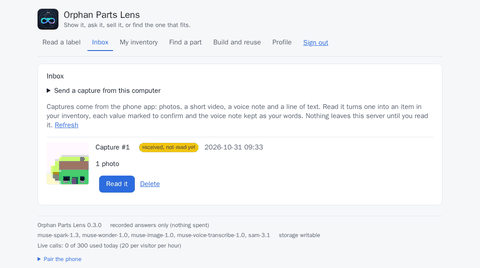
On the web app, Inbox lists the capture, received and not read yet, with its photo. Read it turns it into an item in the inventory.
With the code and without it
The server has two doors. Which one a visitor is behind decides what the web app and the phone show and keep.
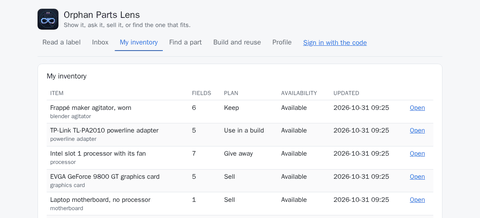
Without the code the web app and the phone are the demo. The pages all open. My
inventory lists the items the owner marked public (the demo set loads as public), with their
values, photos and drawn pictures, and never a clip, a note, a location or a draft. There is
no upload: Read a label and Measure a feature take the demo set's own photos, picked in
a gallery, and each answer is the recording made of that exact photo; no live model is
called. Nothing is kept: every save, draft, price, project, picture and capture is refused
with one line, demo: the code unlocks saving, drafts, prices, projects and captures. A phone
paired from a page that was not signed in is the same visitor: Check says
Without the code this phone is the demo visitor: nothing it sends is kept. Each visitor has
an hourly allowance of calls (20 per visitor per hour on a default server) and the server a
daily one.
With the code the session is signed in for twelve hours on a default server, and the cookie is all it keeps about the visitor. Your own photos are read, by the live models when the server has a key (the hosted one does), and the result is saved: the full inventory, drafts, prices, projects, drawn pictures, and the captures the phone sends. The phone holds a code of its own after a scan of a signed-in page, or the typed access code, and is through the same door. What is kept and for how long is on Privacy; the codes, their lifetimes and how to revoke one are on Demo access.
| Without the code | With the code | |
|---|---|---|
| Inventory | The public demo items | Everything, yours included |
| A label read, a measurement | The demo set's photos, each answered by its own recording | Your photos, read by the live models when the server has a key |
| Saving, drafts, prices, projects, pictures | Refused | Kept |
| Captures from the phone | Refused | In the Inbox |
| What the server keeps about you | Nothing | The session cookie |